Sony FS700 Shoulder mount camera rig – Updated April 2013
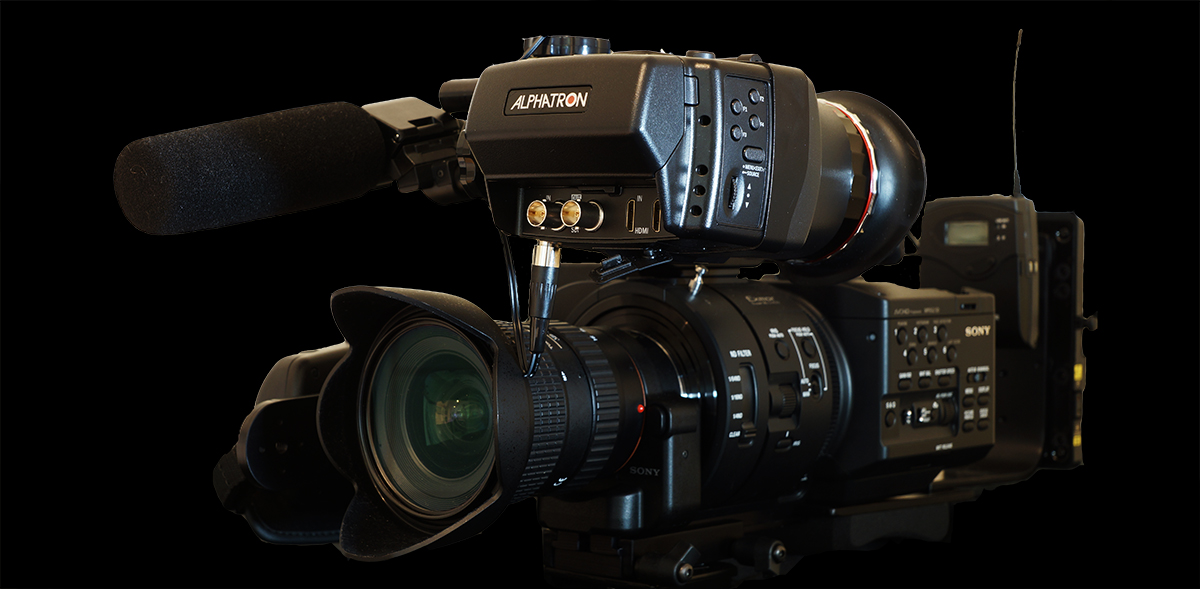
Anyone who has ever used the FS700 would know that it’s not exactly blessed with great ergonomics out of the box, some people do like the way it’s designed but unfortunately, i’m not one of them. After only a few days shooting with this camera i couldn’t wait to find a way to use this camera in a way i’m a bit more used to and that’s shoulder mounted or semi-shoulder mounted.
Shooting an interview handheld for 5-10 minutes really tested my ability to keep the camera firm and steady without going into the land of the shakes. I don’t really like shooing from the torso or chest and i found that with this cameras current ergonomic setup it was the most comfortable position to shoot from.
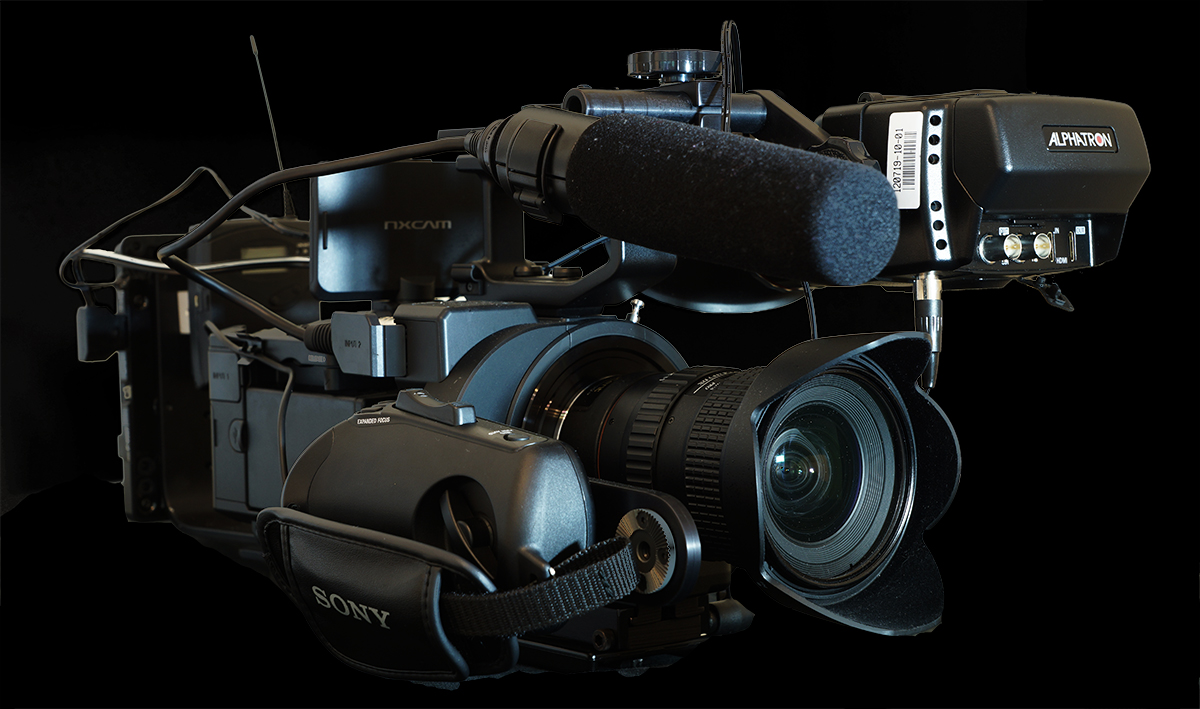
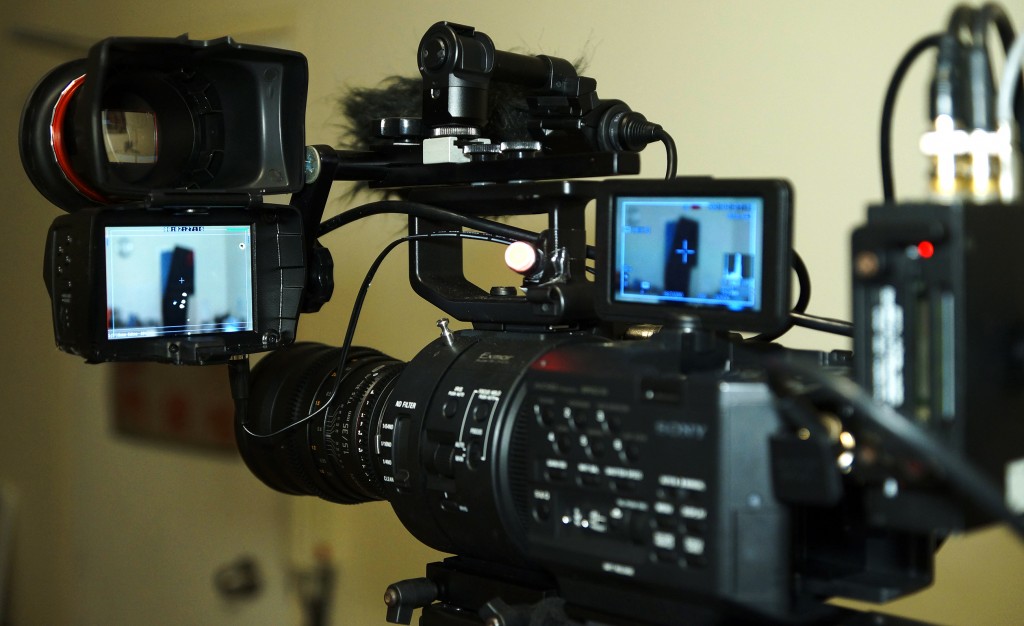
After a bit of research online I found Westside AV’s Olof Ekbergh was making some great looking rig’s for the FS700 with prices that won’t break to bank. I put my order in and have since been trying out the new rig. It does add a bit more weight to the camera which is not great but i think the ergonomics of using the camera now more than makes up for it. It now feels more like i’m shooting with an EX3 rather than a shoe-box with a lens glued on.
I’m still yet to sort out the battery situation, i need to get a couple of V-locks so that i on;y have to worry about charging one battery. There are some other rigs out there that do look very good and solid, but these do come at a price tag, i am very happy with this setup for the time-being.
Update April 2013…
After 6 months of owning this camera putting it through a very hot Australia summer it has performed flawlessly with no problems. I have used it to shoot all the online web content for the Australian Biggest Loser TV series and have been very happy with the image it produces.
The rig is now pretty much complete and I feel I am getting the best possible image out of this camera. Combined with a good prime lens, Metabones Speedbooster, the right picture profile and the Nanoflash recording the image in 4.2.2 100 Mbps colour space the images are fantastic!!
4k and RAW are what everyone is talking about at the moment and while i think these are awesome advances in video technology, for now, Full Frame (with speed boster) 100Mbps 4.2.2 HD images will do just fine!
The FS700 Rig – Hand grip
When it came to using the FS700, from the day i bought it i wanted to be able to use the camera from my shoulder as this is where i feel more comfortable in operating. I loved the fact that i could extend the handgrip out forward away from the camera body which makes it much more comfortable to using on the shoulder.
I have used an F3 before with two vertical style handles out the front, i did like this setup but i did find it a bit limiting when getting different angles other than shoulder height so i decided not to get two handles for the fs700 rig, instead i went to for ENG style hand grip out horizontal parallel to the lens. This setup allows the camera to sit flush on the floor when needed to get ground level shots.
EVF
The next thing was to get an EVF, i went with the Alphatron. You can see more information on this EVF here. I have attached the EVF to the camera using Westside EV’s bracket which bolts onto the top handle.
One thing i would say is be very careful with the sun hitting the screen with this!! I was shooting around sunset a few weeks ago and left the eye piece open for about 30 seconds and the screen got burnt quite badly (you can see the spots on the screen in the picture below).
Base & Shoulder Pad
I wanted to be able to have a nice comfortable shoulder pad and be able to put the camera on & off a tripod quickly without too much hassle. I went with the broadcast style quick release plate for this (VCT-U14) with Westside AV’s shoulder pad. I have also added my own extra bit of foam to add comfort. Doesn’t look the best but it works!
Power solution
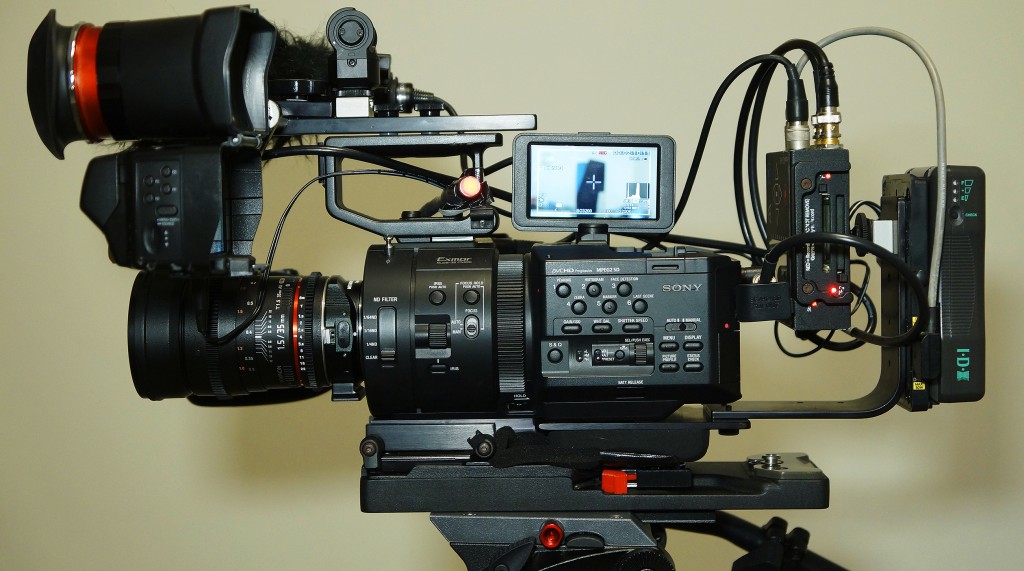
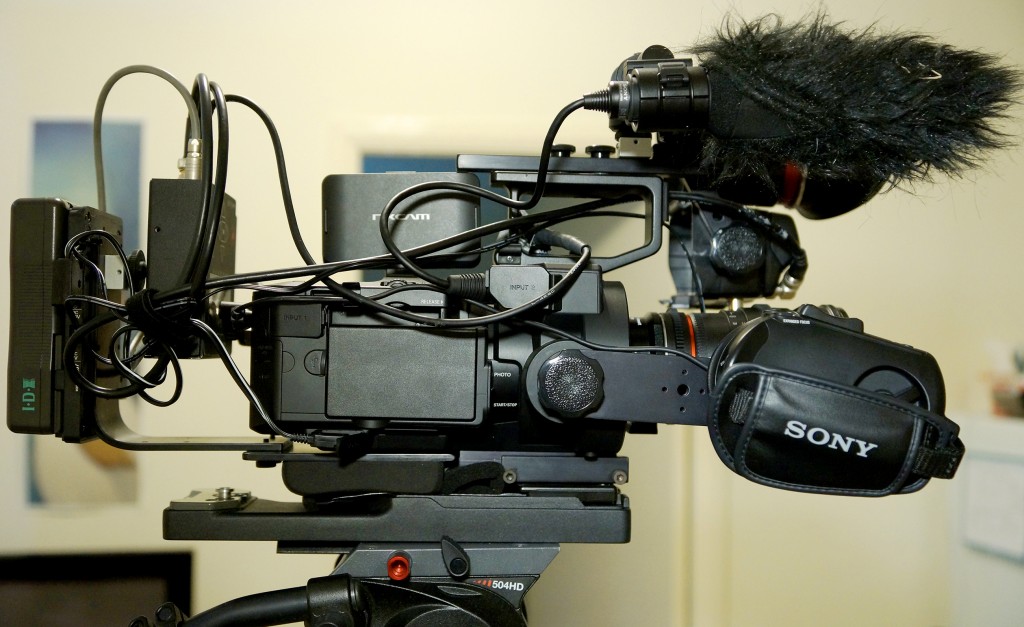
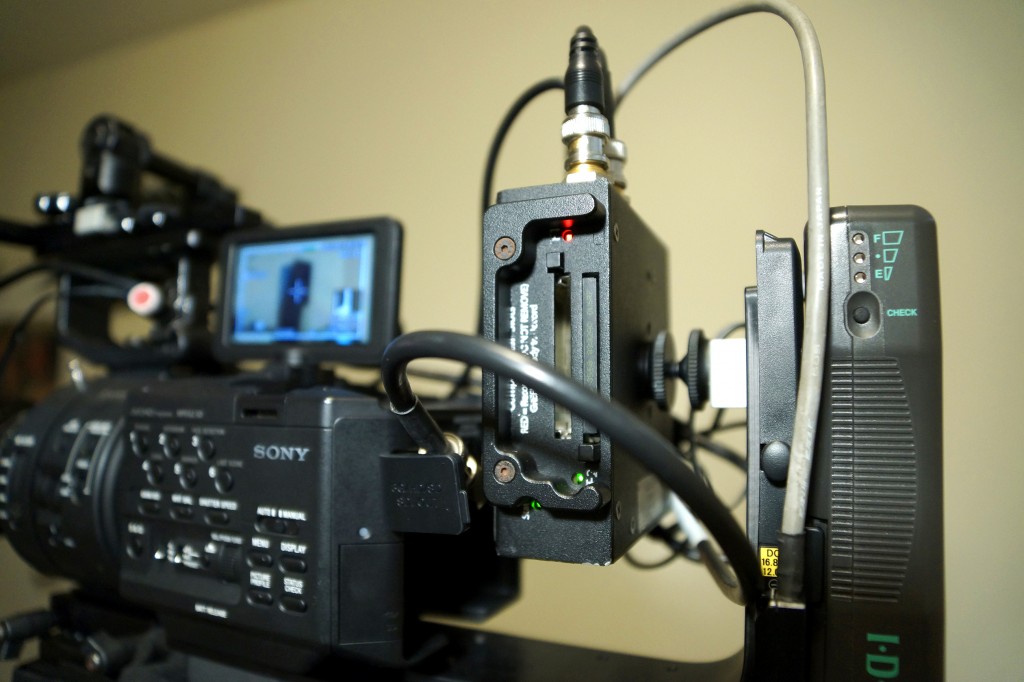
To power an Alphatron using a sony style battery as well as the camera the weight of my batteries was around 500 grams, this wasn’t too bad but having a battery hanging off the front of the EVF didn’t help with balance contributing to an already front heavy rig. The solution was to get a few IDX E7s v-lock batteries. one of these bricks weighs 520 grams so it didn’t add any extra weight but it did put all the battery weight at the back of the camera which has helped greatly in putting the centre of balance of the rig directly under my shoulder. When it is needed, one of these batteries can also power the Nanoflash which is really handy.
External recorder
I do a few jobs where 50mbps 4.2.2 is the minimum delivery specs. To meet this with the fs700 i needed to add an external recorder. The Nanoflash is one of the most versatile recorders out there being able to record directly form the cameras HD-SDI port into an array of codecs to suit the production. I mounted this simple with a cold shoe – 1/4 thread which screws into the back of the recorder. I’ve also hooked up a record remote which feeds up to the EVF. This remote glows a nice satisfying red when the Nanoflash is recording for piece of mind
It’s a tight fit at the back of the camera there but i prefer this as i saves me having to take the rig apart every time i move locations.
Lens mount
I have a few lens mount options to go with, i do wish i had stuck with one lens mount from the start as talked about here. Wen i first purchased the base plate, it was too long which made it really frustrating when i needed to change lenses – i had to remove the entire base plate every time! This is now fix with the help of a hacksaw.
When i need to change lens i can now quickly go from canon EF with the Metabones Speed Booster / EF – E mount, to A-mount with the Lea-2 Adaptor right down to E-mount.

7 Comments
Trackbacks/Pingbacks
- Building the Sony FS700 camera rig - cameraoperatorsydney.com | Camera operator Sydney - freelance lighting cameraman & non-linear editor FS700 / PMW 200. - [...] Click here for an updated version of this post [...]



Hi Paul, that’s a nice looking, minimal type of rig, very similar the kind of thing I’m looking to set up, though not necessarily for the FS700. Could you mention where you got the handgrip?
Cheers,
Keith
Hi Keith,
Thanks very much, it fits nicely onto the shoulder and is well balanced. I got the handgrip extender from westside AV. Just google them and they should come up, they are based in the states. The actual handgrip came with the camera but im sure you know that. What camera are you looking to set up?
Cheers
Paul
Hey Paul,
That is a great little setup. Im picking up my 700 tomorrow, and straight into a 10 day job. (local stock issues over in the West!)
Not ideal as I wanted some time with the camera to setup, but am looking like a similar setup to yours over time.
Just wanted to ask about the shoulder pad setup and the v-lock setup? Where you got them?
cheers
Gavin
Hi Gavin,
Thanks for getting in touch mate, the setup i have for the FS700 is going well, and it balances quite good.I bet getting this sort of equipment over in perth is a tough one! I have issues all the time here in Sydney. Never realised how good it was in London to just be able to get on the tube and visit a professional camera shop and just have everything in stock ready to buy!
I got the shoulder setup from Westside AV, they are a small company over the in States and the owner (Olof) does a great job. I got Olof to make up a v-lock back plate with a wire coming directly out of the plate which powers the camera – this free up a d-tap port for me to power the nanoflash when needed. He also ran a cable directly out to power the EVF as well.
One tip: if your using this setup outdoors and giving it a bit of rough treatment i would buy a couple of 2ft (have fun getting one of these in AUS!!) SDI cables as spare as they might fail every 6 months or so. Videoguys in Melbourne sell 3ft bnc to bnc for about $15 but they are a tad long at 3ft. Ideally get someone to make you a cable that fits a good length, then get a couple of 75Ohm elbow connectors and you should be able to tuck the cable into the camera quite nicely.
Hope this helps
Paul
Hi Paul, thank you for all these informations ! I would like to buy an external nanoflash recorder, but i’ve got a question, what kind of compact flash card do you use? Does it need a high Mbps rate ? like 100 mbps for a best writing time in 4:2:2 ?
Thank you for your help !
Tom
Hi Tom,
I use Transcend CF cards, i’ll have to get back to you with the speed, not sure off the top of my head. Never had an issue with them, they work great. Although i have never gone above 100MbpS output on the Nanoflash so i’m not sure how far you can take the cards with Bit rate. Convergent Design’s website have a card guide that they update frequently.
One thing you may want to consider at the moment is the Convergent Design Odessy. Looks like we will be able to record 10 bit 4.2.2 to that recorder when it’s released. The Nanoflash is 8-bit. Depends on your budget though and your needs. I have been using the Nanoflash to record 50Mbps XDCAM codec out of the FS700 for a few months now and i’m really happy i made the purchase.
Let me know how you go!
Paul
Hi Paul,
I’m happy Olof’s kit is working for you. We are also dealers for the Odyssey and waiting for its release. We might get to try out a working model this weekend as Dan Keaton from Convergent is coming up. Olof is also designing a bracket to hold the Odyssey for the FS700.
Sharyn from Westside AV